Problem Description #
If your E-bike produces abnormal noise during braking, the braking force weakens, or a longer brake lever travel is required to achieve the usual stopping effect, this could indicate severe wear on the brake pads.
Severe wear on the brake pads can impact braking performance. When the worn pads expose their metal parts, they may come into direct contact with the brake rotor, causing abnormal noise. If not replaced in time, this can result in damage to the brake rotor.
Solution:
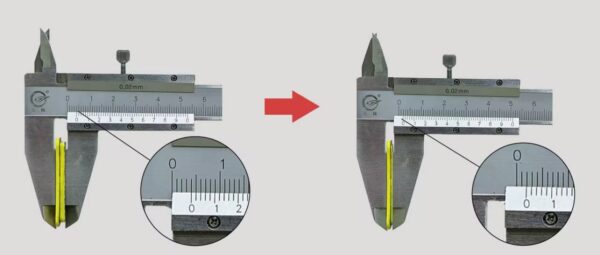
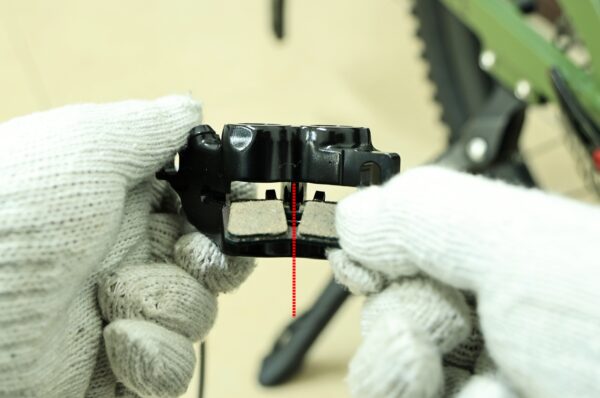
Replace the brake pads. When the wear on the brake pads exceeds half of their original thickness—approximately from the original 4mm down to about 2mm—they should be replaced. (See the diagram below)
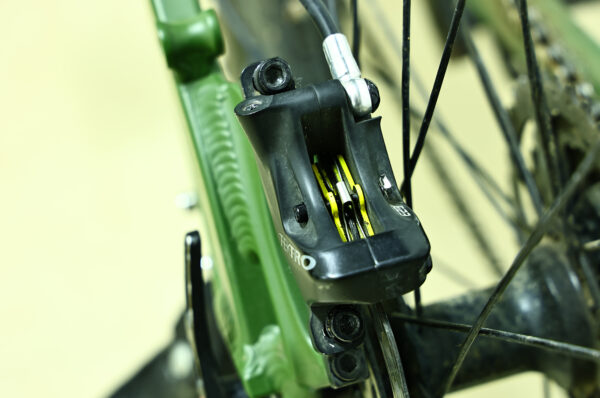
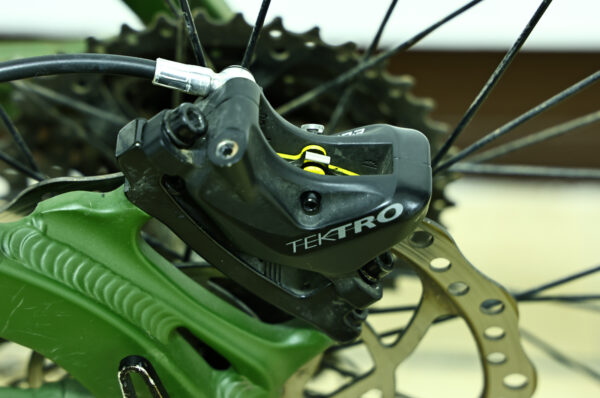
Below are two commonly used types of brakes. Choose the appropriate method to replace the brake pads based on your brake type.
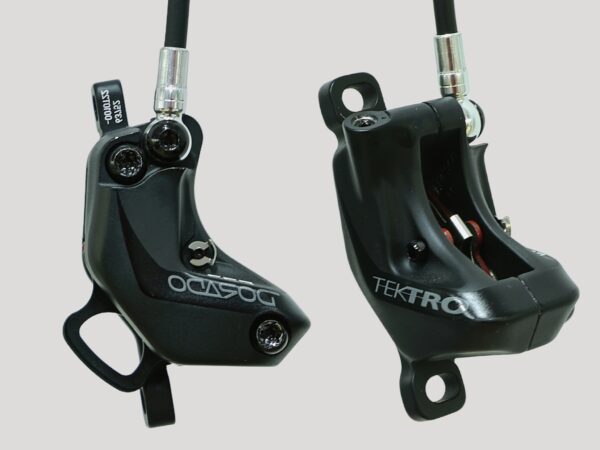
MAGURA TEKTRO
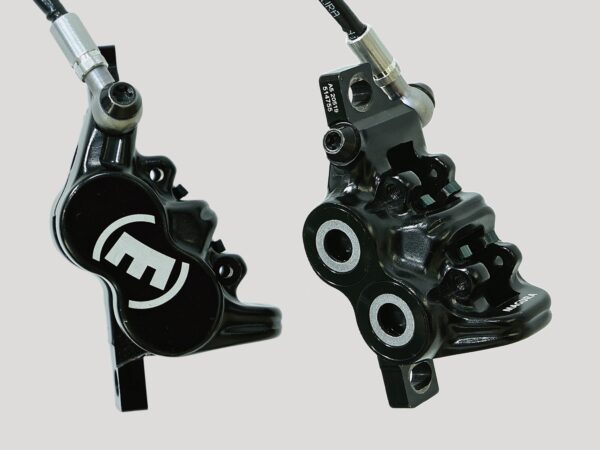
MAGURA #
I.Prepare Tools #
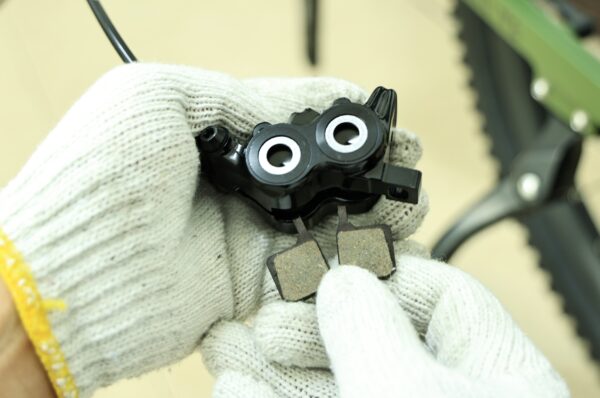
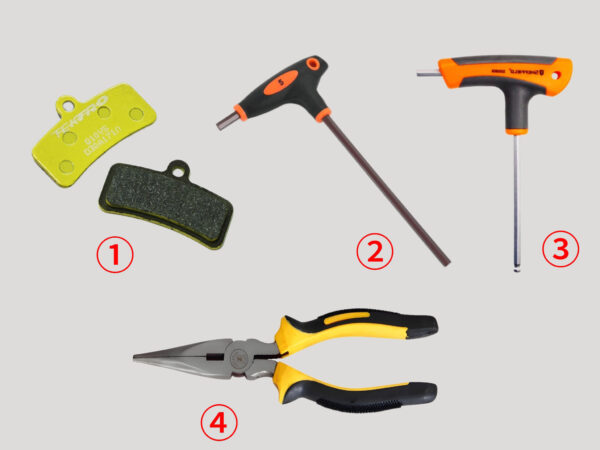
To replace the MAGURA brake pads, you will need the following tools:
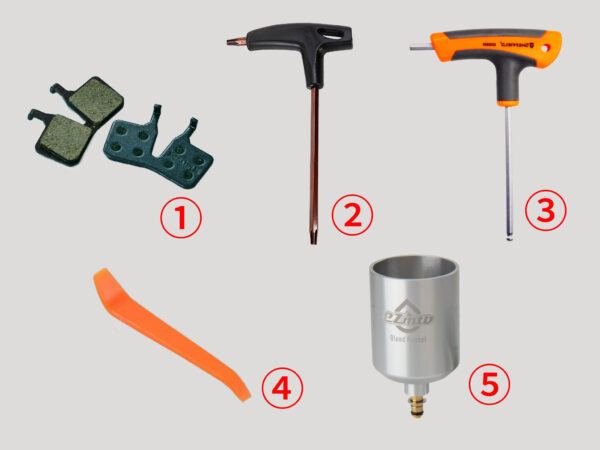
① MAGURA brake pads
② T25 wrench
③ 5mm Allen wrench
④ Plastic pry bar
⑤ Oil funnel
II.Important Notes #
1、The brake pads must not be exposed to any oil or grease. If they get contaminated, discard them immediately and replace with new ones.
2、New brake pads require a break-in period to achieve maximum braking power. Please wear appropriate protective gear and perform the break-in in a safe area by riding at a speed of 30 km/h and applying the brakes about 30 times.
III.Replacement Steps #
1、Remove the Old Brake Pads: #
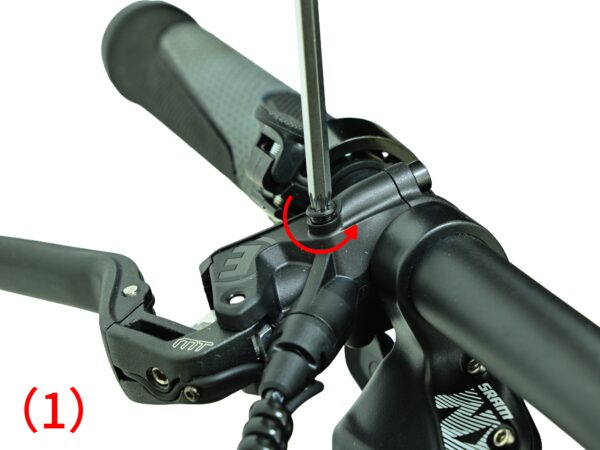
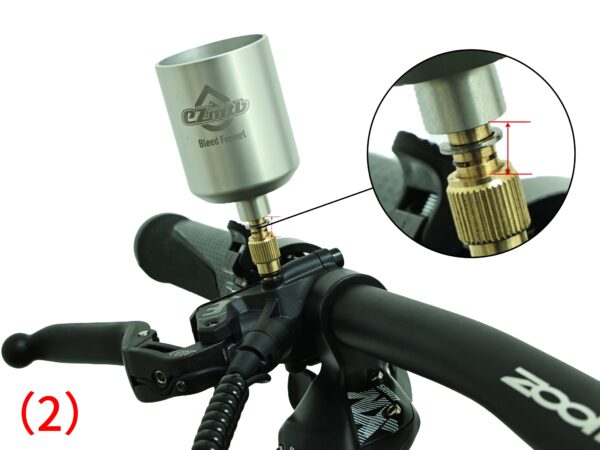
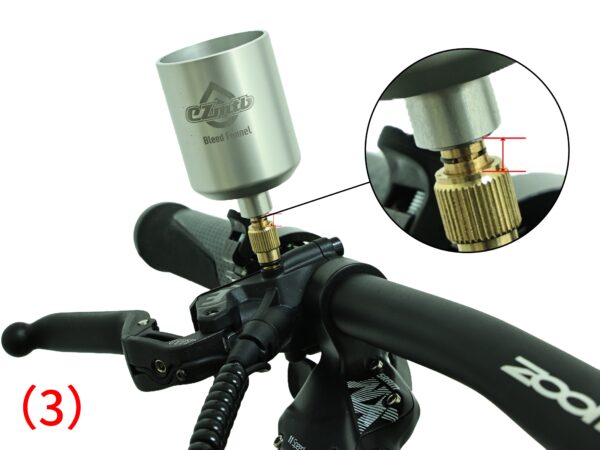
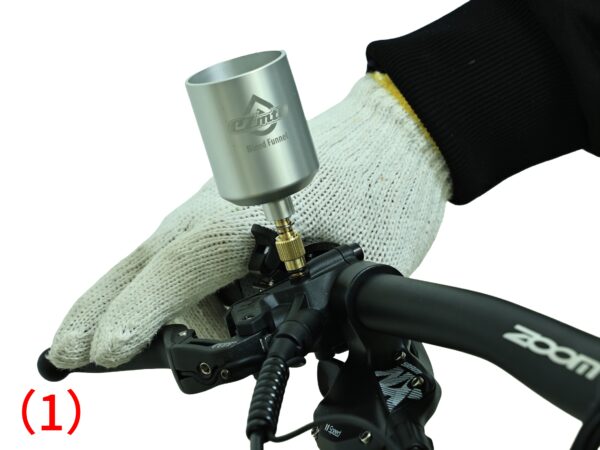
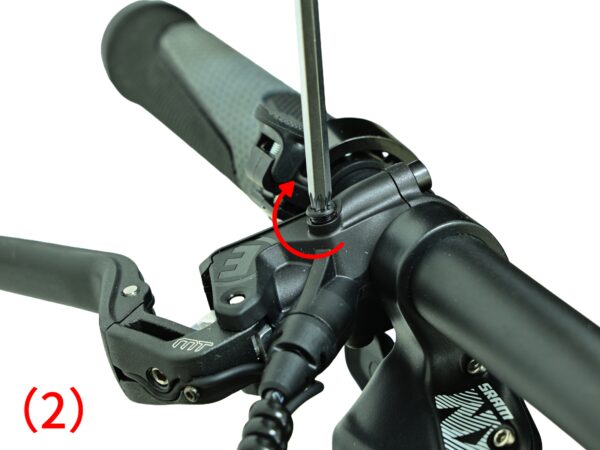
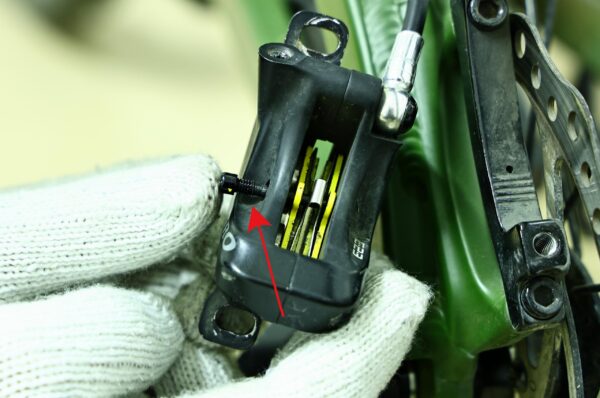
①、Use the T25 wrench to rotate and open the brake oil hole in the direction of the arrow, as shown in (Figure 1). Install the oil funnel. If the funnel has an on/off switch, turn it on (Figure 2). Pull up to open, as shown in (Figure 3).
(Opening the brake oil hole is necessary for installing the oil funnel to prevent brake fluid from leaking when pushing the pistons back.)
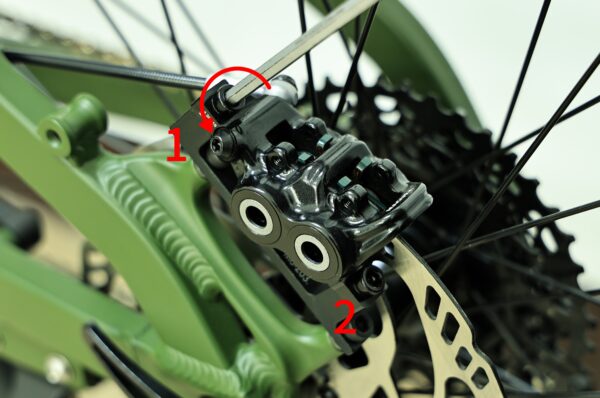
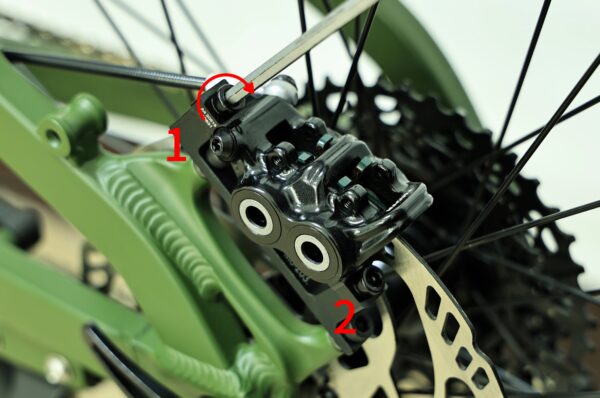
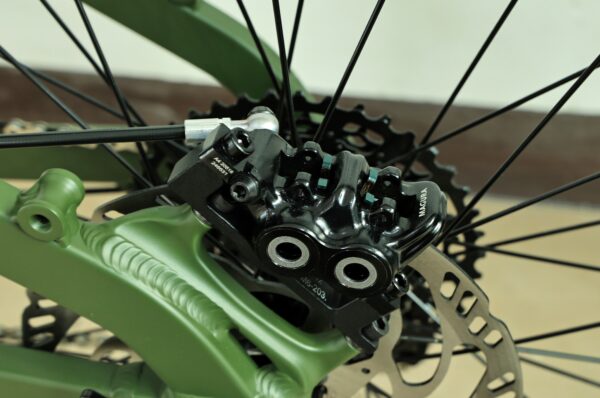
②、Use a 5mm Allen wrench to rotate in the direction of the arrow and remove the two screws from the brake mounting bracket (as shown in the image). Then, remove the brake caliper from the bike.
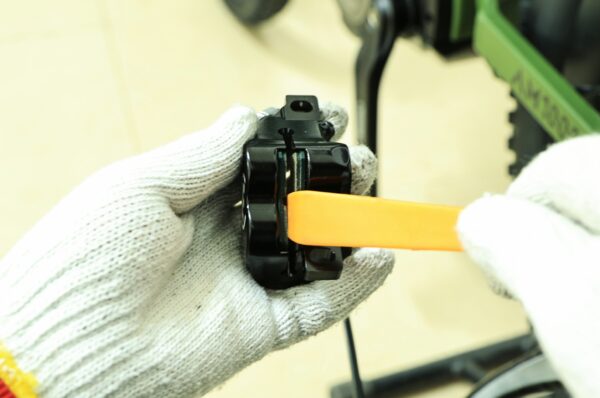
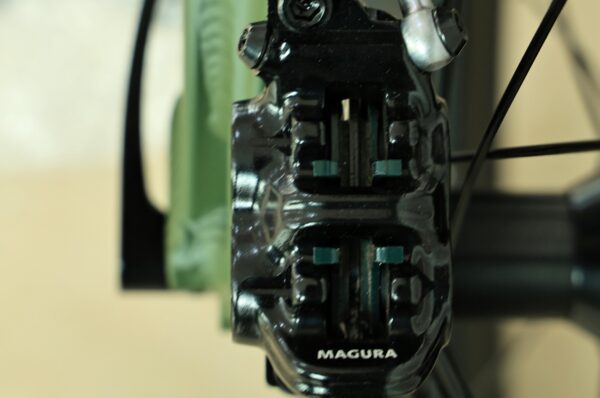
③、Use a plastic pry bar to insert between the brake pads. Gently move it back and forth to push the pistons back to their starting position (as shown in the image).
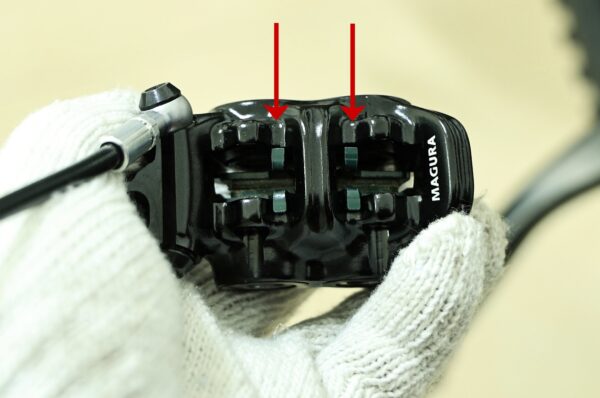
④、Push the hook of the old brake pads towards the center of the caliper (as shown in the image).
⑤、Carefully remove the old brake pads from the caliper (as shown in the image).
2、Installing the new brake pads: #
①、Carefully place the new brake pads into the caliper. Align the gap of the brake pads with the support point inside the caliper (as shown in the image).
②、Attach the four hooks of the brake pads to the caliper. The magnets inside the caliper will automatically attract the brake pads (as shown in the image).

③、Reinstall the brake caliper back onto the bicycle, ensuring that the disc brake rotor is centered within the caliper. Use a 5mm hex wrench and rotate in the direction of the arrow to tighten the two screws on the brake mounting bracket (as shown in the image). The tightening torque should be 5-6N.m, approximately 0.51 to 0.612 kgf.
3、Oil and Adjust: #
①、 After installing the brake caliper, gently squeeze the brake lever to allow the pistons in the caliper to pop out and function properly. Allow the brake fluid in the funnel to flow back into the brake line. Repeat the process of squeezing the lever 5 to 6 times. Afterward, close the funnel valve, as shown in the image (1). Remove the funnel, and using a T25 wrench, rotate in the direction of the arrow to tighten the oil port screw, as shown in the image (2). The tightening torque should be 0.5N.m, approximately 0.051 kgf.
②、After replacing the brake pads, you will need to re-adjust the brakes to ensure optimal braking performance with no noise or vibration. (If you need guidance on how to adjust the brakes, please click the link for reference: Brake Adjustment Guide)
IV.Completed Replacement Diagram. #
TEKTRO #
I.Tools Needed #
To replace the TEKTRO brake pads, the following tools are required (as shown in the image):
①、 TEKTRO brake pads
②、5mm hex wrench
③、3mm hex wrench
④、 Needle nose pliers
II.Precautions #
1、Do not allow brake pads to come into contact with any grease or oil. If the pads are contaminated, discard them and replace with new ones.
2、New brake pads need to be broken in to achieve optimal braking performance. Wear appropriate protective gear and perform the break-in process in a safe area by riding at 30 km/h and applying the brakes about 30 times.
III.Replacement Steps #
1、Remove the Old Brake Pads: #
①、Using a 5mm hex wrench, rotate and remove the two mounting screws on the brake mount (as shown in the image). Then, detach the brake caliper from the bike.
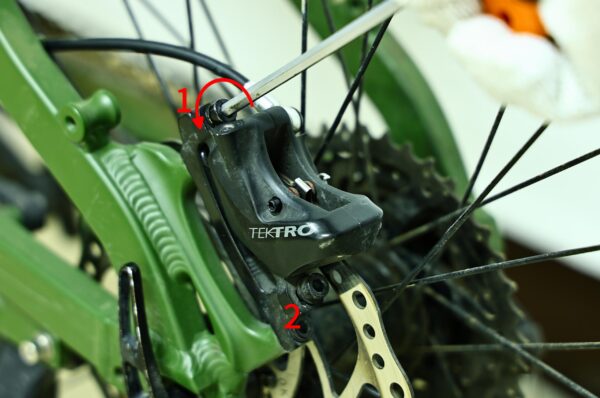
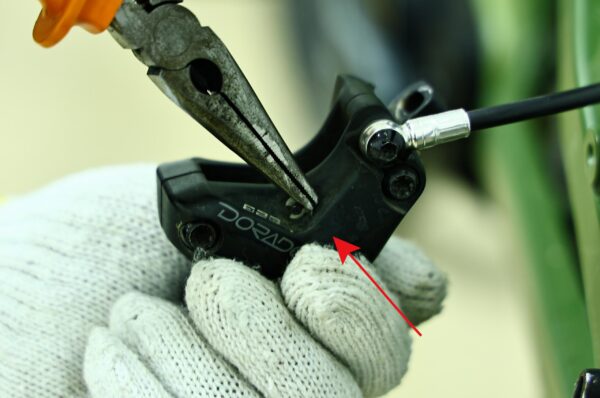
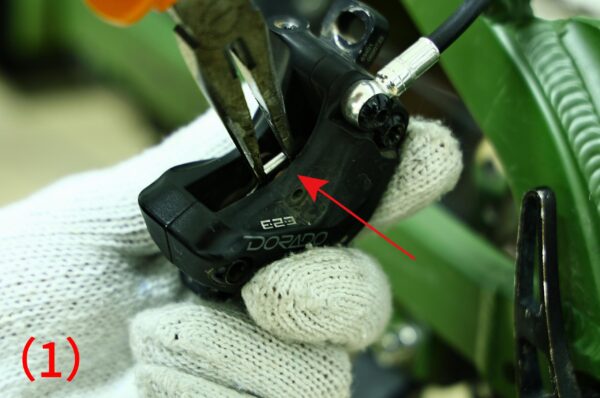
②、Use needle nose pliers to remove the retaining clip from the brake pad locating pin screw (as shown in the image). Place the clip in a safe and visible location.
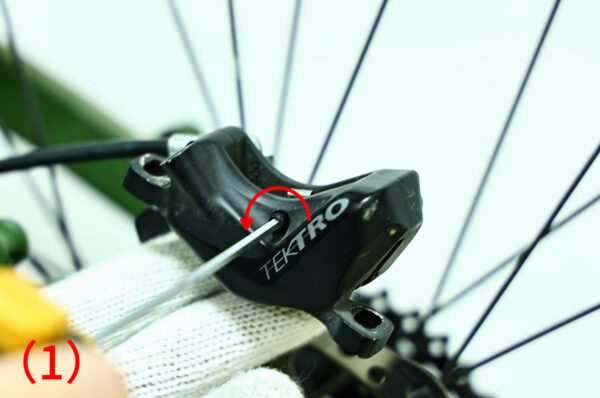
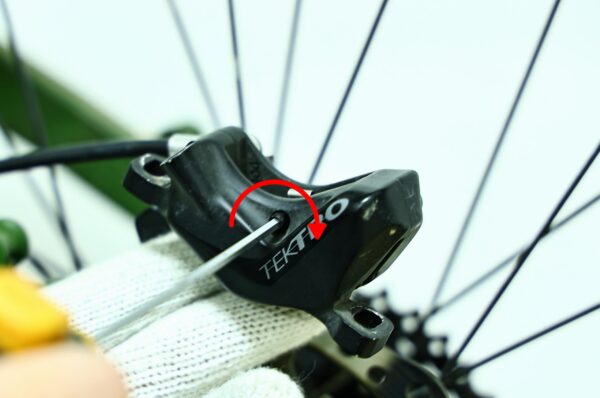
③、Use a 3mm Allen wrench to rotate in the direction of the arrow to loosen the brake pad locating pin screw (as shown in image 1). Then, remove the pin (as shown in image 2).
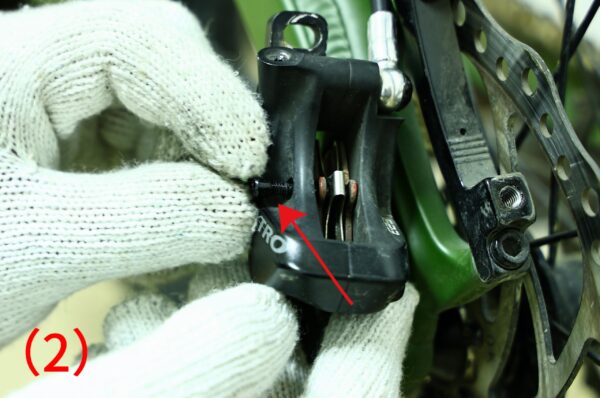
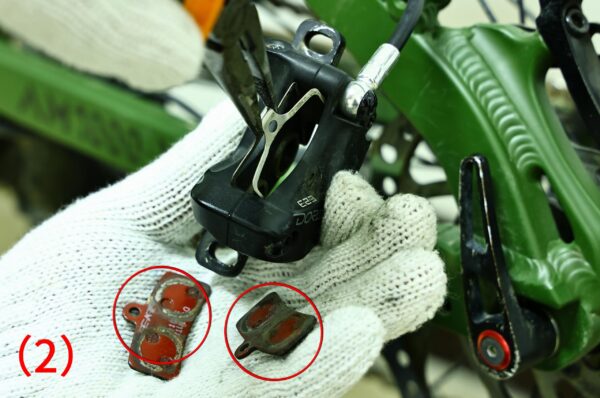
④、Use needle-nose pliers to remove the compression spring (as shown in image 1). The old brake pads will then fall out (as shown in image 2).
2、Install the New Brake Pads: #
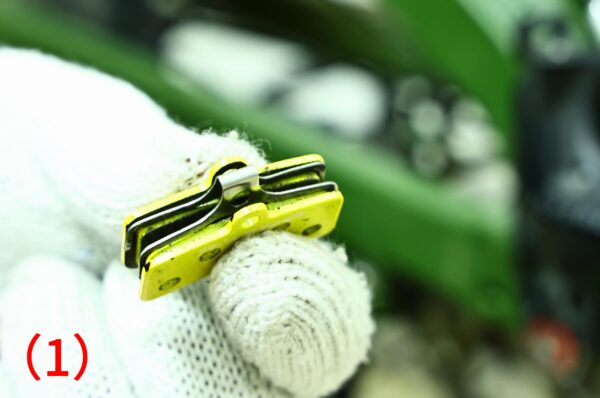
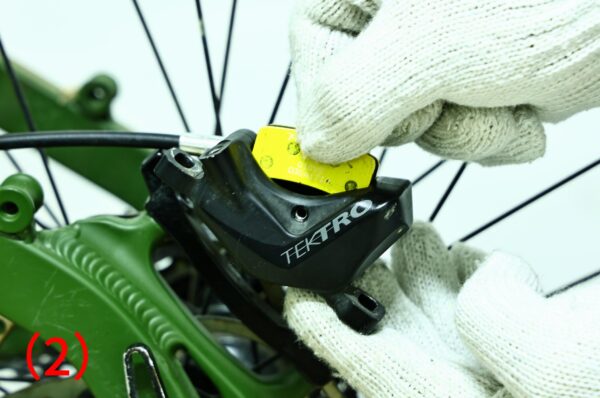
①、Insert the new brake pads with the compression spring, as shown in image (1). Then, insert them into the brake caliper, as shown in image (2).
②、Insert the brake pad positioning pin screw into the brake caliper, passing through the brake pads and the compression spring, as shown in the image.
③、Use a 3mm hex wrench to rotate the brake pad positioning pin screw in the direction of the arrow to tighten it, as shown in the image. The tightening torque should be 3-5 N.m, approximately 0.306 to 0.51 kgf.
④、Use the needle nose pliers to reattach the previously removed circlip onto the new brake pad positioning pin screw, as shown in the image.
⑤、Reinstall the brake caliper onto the bicycle, ensuring that the disc brake rotor is centered within the caliper. Use a 5mm hex wrench to tighten the two installation screws on the brake mounting bracket by rotating them in the direction of the arrow (as shown in the image). The tightening torque should be 5-6 N.m, approximately 0.51 to 0.612 kgf.

3、Adjustment: #
After replacing the brake pads, it is necessary to re-adjust the brakes. Ensure that the brake performance is optimal, with no noise or vibrations. (For brake adjustment methods, please click the link for reference: Brake Adjustment Guide)更换刹车来令片以后,需要重新调试刹车。确保刹车性能良好,没有噪音或震动。(刹车调试方法如需要请点击链接查看参考:https://www.frey-bike.com/docs/%e8%b0%83%e8%af%95%e5%88%b9%e8%bd%a6/)
IV.Completion Illustration: #