If you purchased an E-bike such as the Jp FAT, CC-FAT, CC, or TOURING and need to upgrade the battery, you will need to reinstall the wiring cover. This is because the upgraded battery is larger in size compared to the original one. To ensure compatibility with the new upgraded battery, the original wiring cover inside the battery tube must be replaced. Below are the installation steps for the new wiring cover after the battery upgrade.
I.Preparation #
To install the new wiring cover after upgrading the battery, you will need the following tools (as shown in the image below).
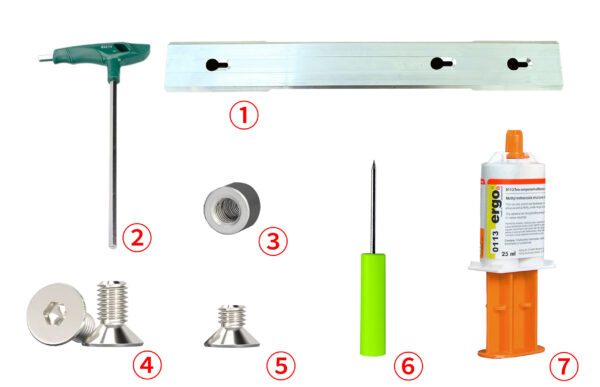
①、 New Wiring Cover
②、 3mm Hex Wrench
③、 Threaded Spacer (Inner Diameter 5mm, Outer Diameter 8mm, Height 6mm)
④、 M5x12mm Flat-Head Hex Screws (x2)
⑤、 M5x8mm Flat-Head Hex Screw
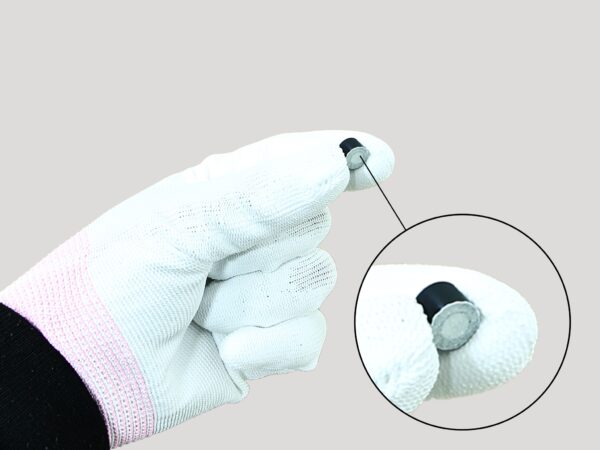
⑥、 Pin Tool
⑦、 AB Strong Adhesive
II.Precautions #
1、Install the wiring cover in a clean, flat, and obstacle-free area to ensure safe operation.
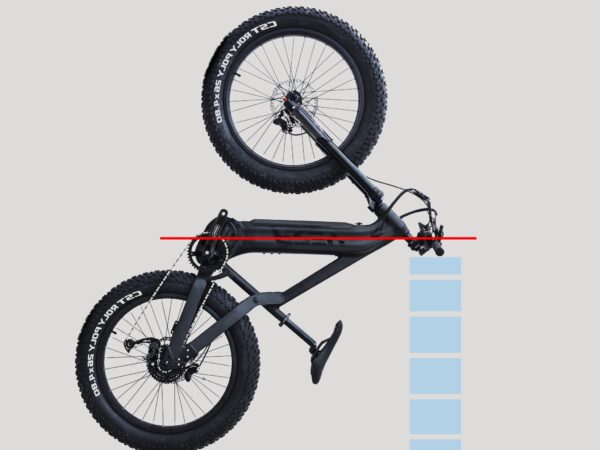
2、Turn the bike upside down and place relatively high foam pads on both sides of the handlebars. This ensures the battery tube remains in a horizontal position (as shown below).
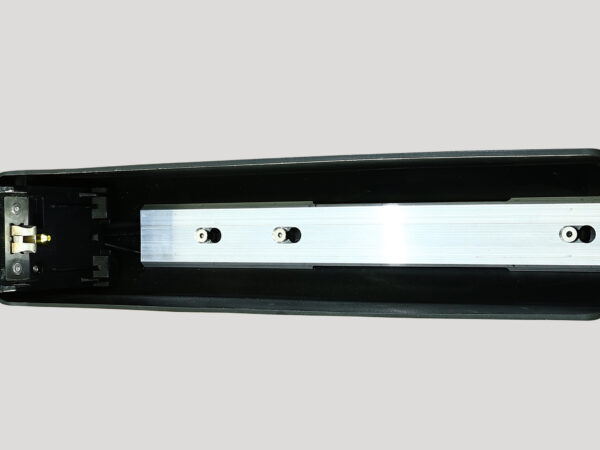
3、Remove the old battery and the front wheel. If your bike has a front mudguard installed, remove it as well to avoid any obstruction when installing the new wiring cover.
4、Detach the original wiring cover and use adhesive tape to hold the wires apart, directing them to both sides (as shown below).
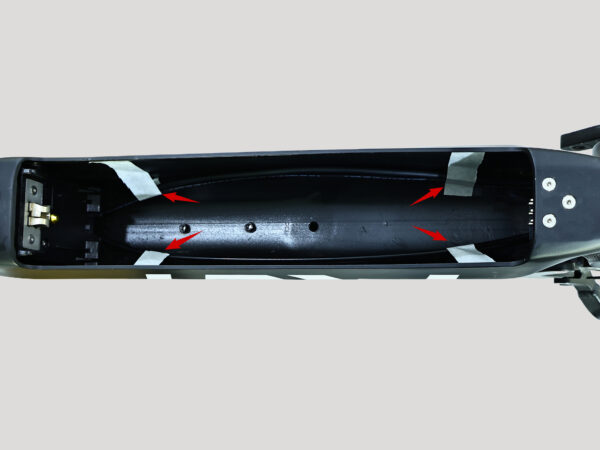
5、Use adhesive tape to seal one end of the threaded spacer and trim off any excess tape (as shown below).
III.Steps of Operation #
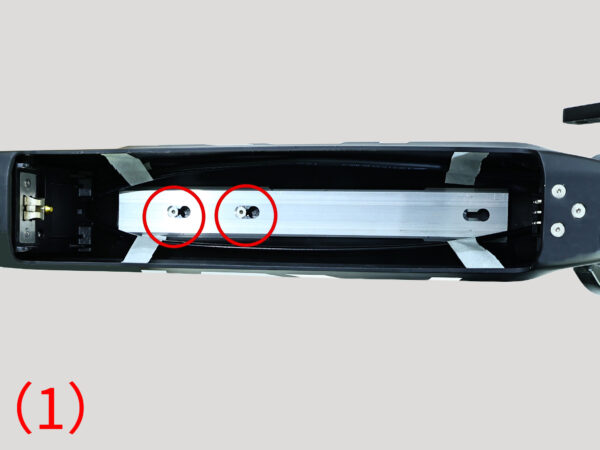
1、Install the new cable routing cover plate. Use a 3mm hex wrench to secure it with two M5x12mm flat head hex screws (as shown in Figure 1).
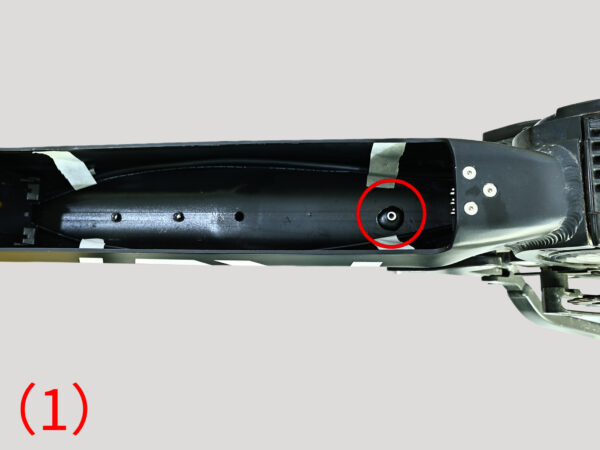
Note: The installation direction of the cover plate must have the end with the round hole facing toward the motor (as shown in Figure 2).
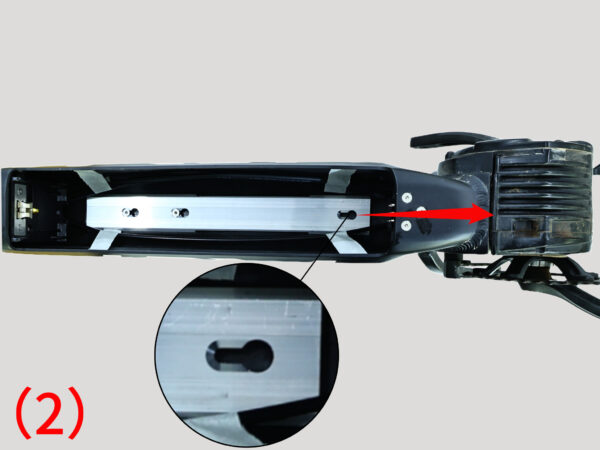
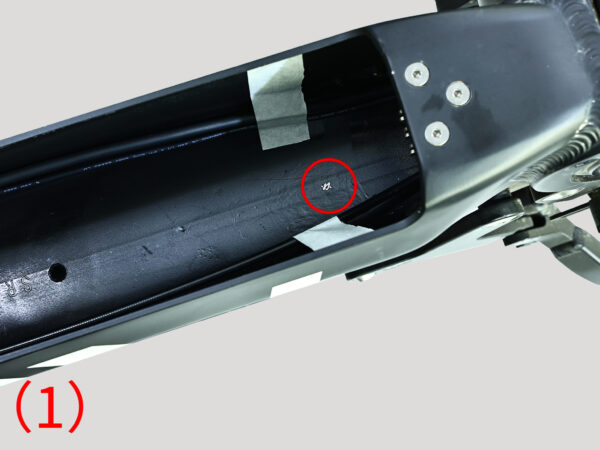
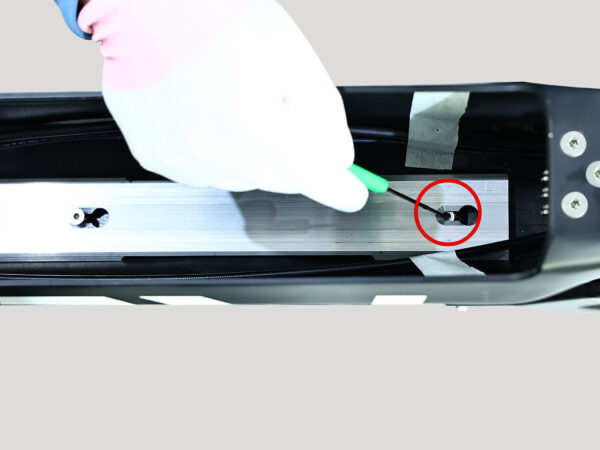
2、Use the pin tool to make a mark at the unused screw hole position on the cable routing cover plate (as shown in the image).
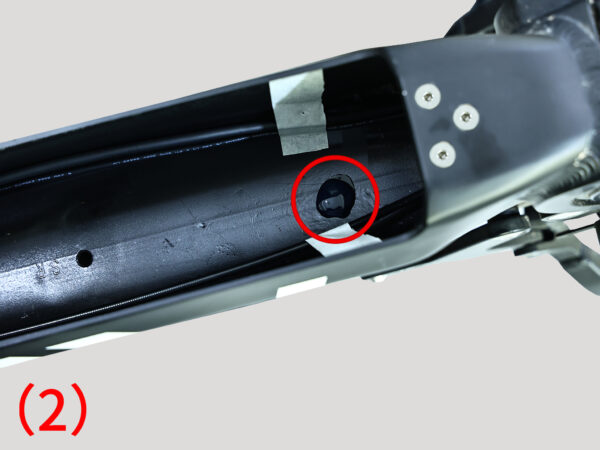
3、Remove the cable routing cover plate and locate the position marked with the pin tool, as shown in Image 1. Then apply an appropriate amount of AB super glue, as shown in Image 2.
4、Mix the AB super glue thoroughly, as shown in Image 1. Then, place the side of the internal threaded spacer covered with tape facing down, as shown in Image 2.
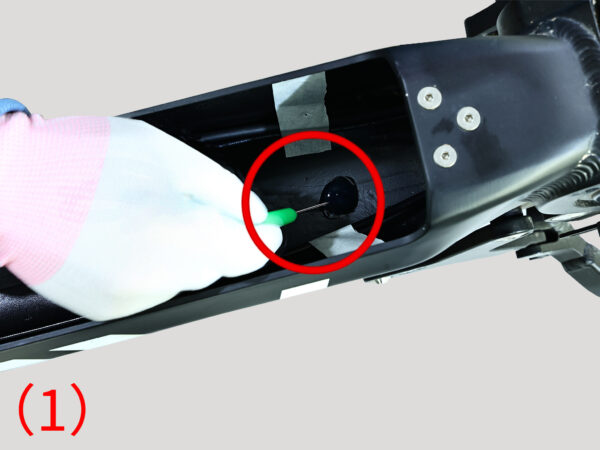
5、Install the two screws for the wire cover plate as shown in Step 1. Use the pick to adjust the position of the internal threaded spacer (as shown in the image). Afterward, remove the wire cover plate.
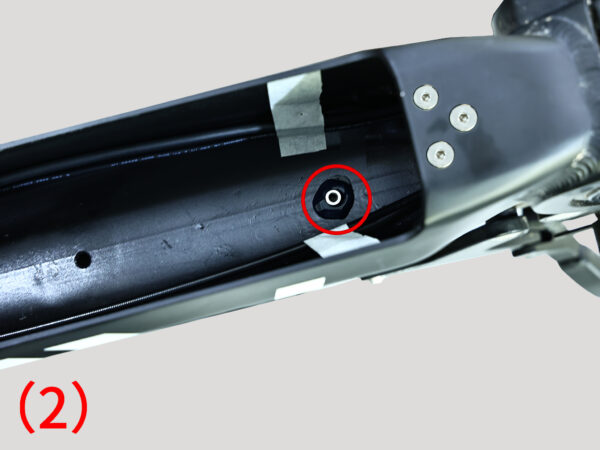
6、Wait for approximately 24 hours for the AB strong adhesive to cure (as shown in the image). Then, remove the adhesive tape that was securing the wires and rearrange the wires properly (as shown in the image).
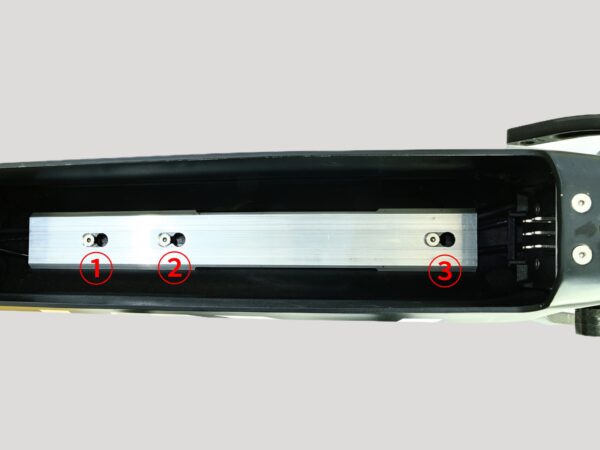
7、Reinstall the new cable cover plate and secure it with screws (Note: make sure the screws are not mixed up in length. Install two M5x12mm hexagonal flat head screws in the positions marked as ① and ② in the image, and install one M5x8mm hexagonal flat head screw in the position marked as ③).
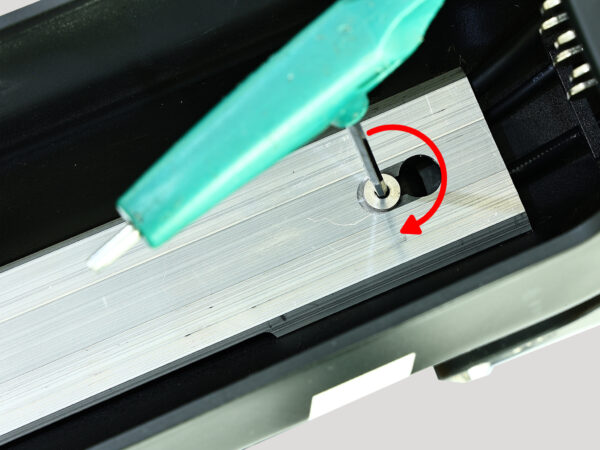
8、Use a 3mm hex wrench to tighten the three screws on the new cable cover plate in the direction of the arrow. The tightening torque should be 3-5N.m, which is approximately 0.306 to 0.51 kgf (as shown in the image).
IV.New Cable Cover Plate Installation Completion Diagram #
The following is a diagram showing the completion of the new cable cover plate installation. After the new cable cover plate is installed, the upgraded new battery can be installed.