I.Preparation #
To install the front mudguard on the Fat ebike, you will need the following tools (as shown in the image below).

①、 6mm Allen wrench
②、 5mm Allen wrench
③、 4mm Allen wrench
④、 M6x110mm screw (with flat washer)
⑤、 Fat ebike front mudguard
II. Precautions #
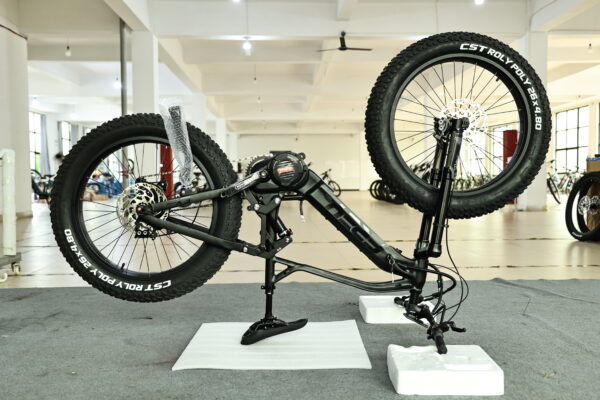
When installing the front mudguard on the Fat ebike, you need to invert the bike. Please pay attention to the following two points:
1、Safety Area: Choose a flat, clean, and obstacle-free area for the operation. (As shown in the picture)
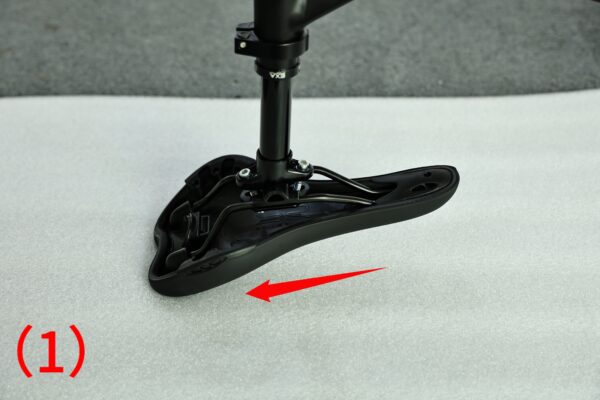
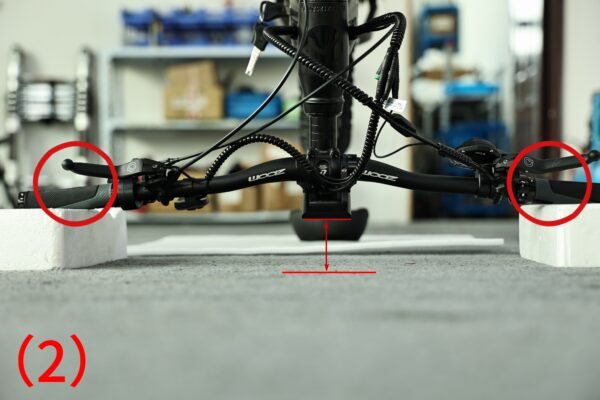
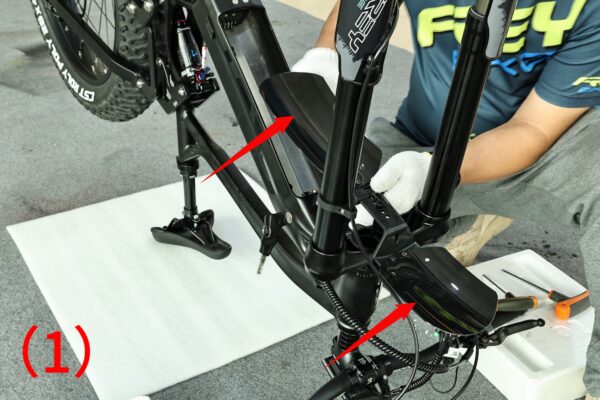
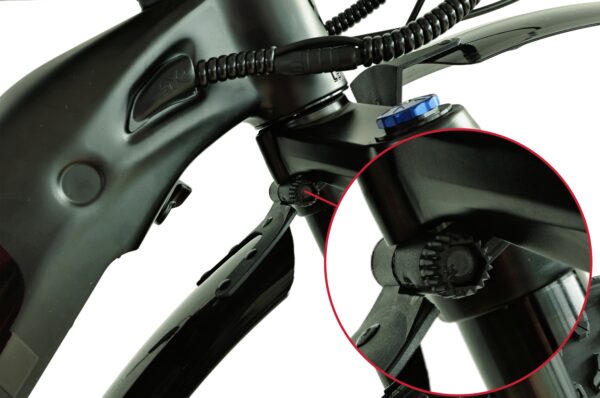
2、Protect the Saddle and Instruments: When inverting the bike, the handlebars and saddle may come into contact with the ground. You can place a soft pad under the saddle to prevent dirt or scratches, as shown in picture (1). Place two relatively high foam pads on both sides of the handlebars to keep the instruments suspended, ensuring they won’t be damaged during the operation, as shown in picture (2).
III.Remove the Front Wheel #
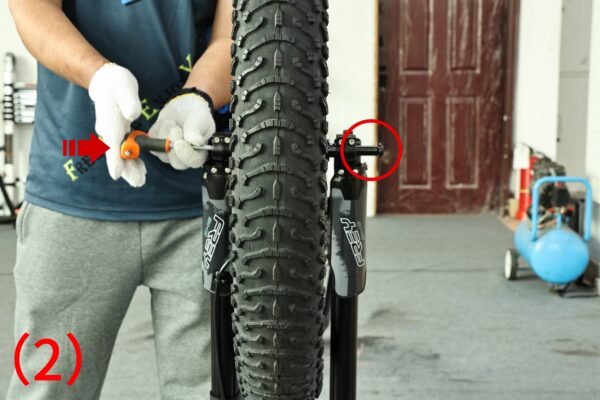
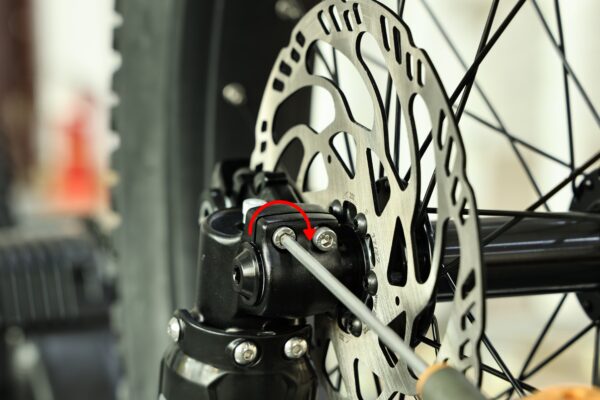
1、Use a 4mm Allen wrench and rotate in the direction of the arrow to loosen the two screws on each side of the front fork. (As shown in the picture)
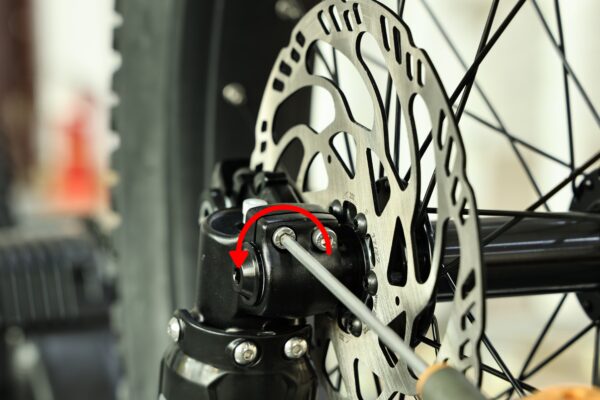
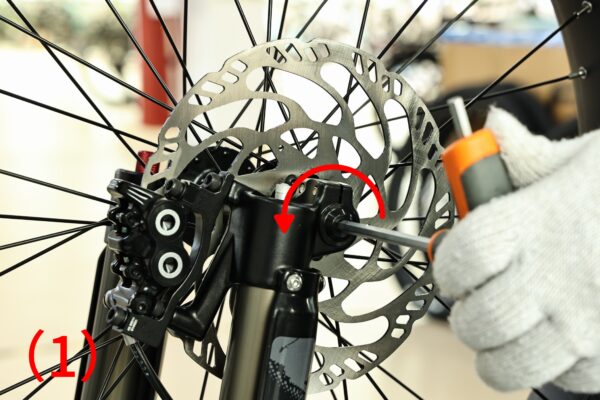
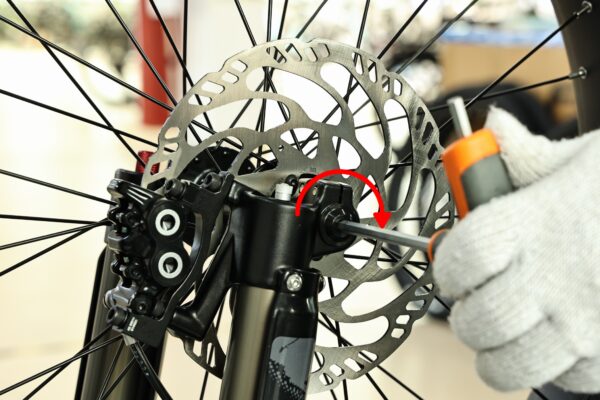
2、Use a 6mm Allen wrench and rotate in the direction of the arrow to loosen the front fork axle screw, as shown in the picture (1). Hold the side of the front fork axle with the 6mm Allen wrench and lightly tap the wrench to push the axle out of the fork, as shown in the picture (2).
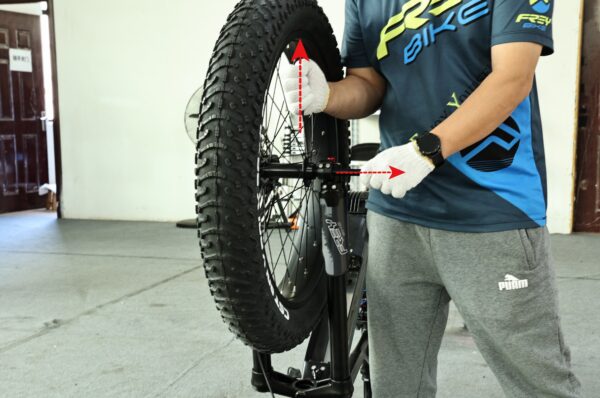
3、Use your left hand to pull out the fork axle, and with your right hand, remove the front wheel, as shown in the picture.
IV.Mudguard Installation Steps #
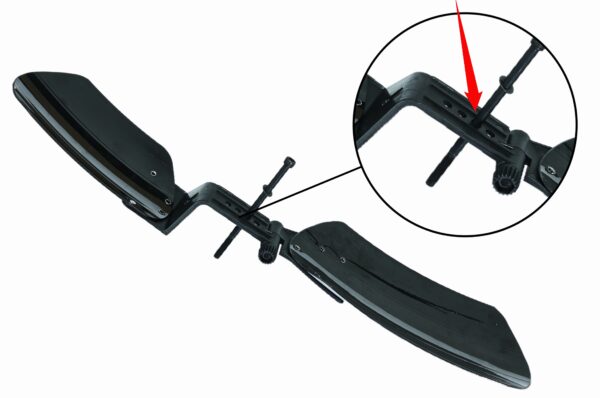
1、Rotate in the direction of the arrow to remove the expansion screws on the front mudguard. (As shown in the picture)

2、Use the M6x110mm bolt (with flat washers) to pass through the shorter side of the mudguard, starting from the third hole. (As shown in the picture)
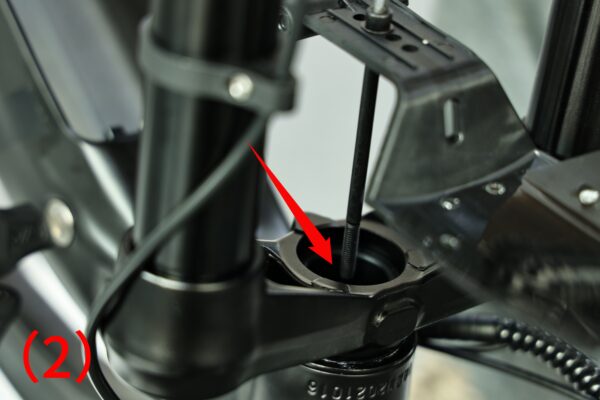
3、Position the shorter end of the mudguard towards the handlebars and the longer end towards the rear wheel, as shown in the picture (1). Insert the bolt into the vertical tube of the front fork, as shown in the picture (2).
4、Use a 5mm Allen wrench and rotate it in the direction of the arrow (as shown in the picture). This will thread the bolt into the nut inside the vertical tube of the front fork. Tighten it with a force of 3-5N.m, approximately 0.306 to 0.51 kgf. (Our Fat ebike come from the factory with a pre-installed nut inside the front fork).
V.Installing the Front Wheel #
1、Hold the front wheel with your right hand and place it on the front fork. With your left hand, insert the front fork axle rod through the front wheel hub (as shown in the picture). (Make sure the front wheel hub aligns with the hole on the front fork so that the axle rod can pass through smoothly).

2、Use a 6mm Allen wrench, rotate in the direction of the arrow to tighten the front fork axle rod screw. The tightening torque should be between 9-13.5N.m, approximately 0.91 kg (as shown in the picture).
3、Use a 4mm Allen wrench, rotate in the direction of the arrow to tighten the two screws on each side of the front fork. The tightening torque should be between 3-5N.m, approximately 0.306 to 0.51 kg (as shown in the picture).
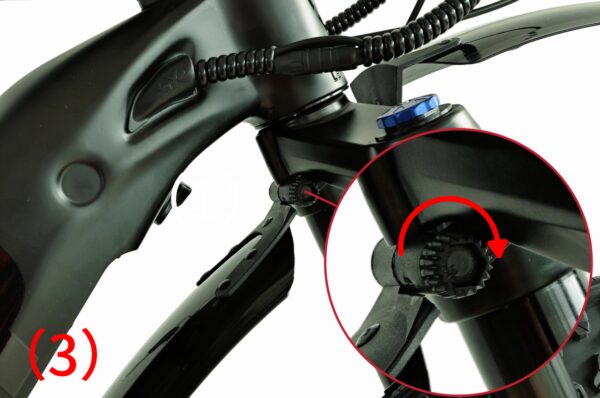
VI.Adjusting the Angle #
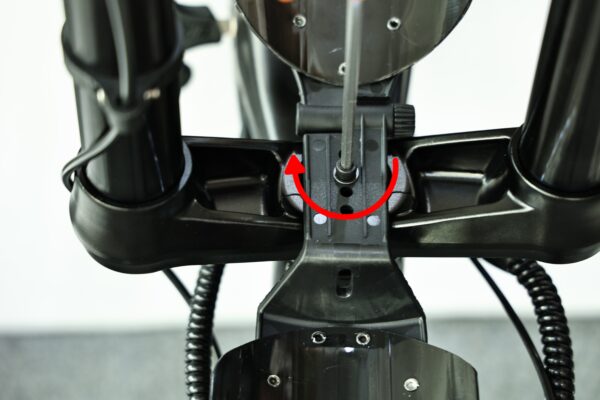
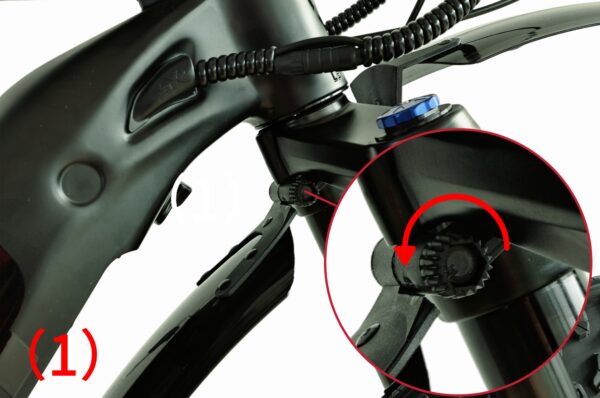
1、Once the front wheel is installed, you can flip the bike over. The button on the mudguard can be used to manually adjust the angle of the mudguard (as shown in the picture).
2、Turn the button on the mudguard in the direction of the arrow to loosen it manually (as shown in the picture). This will allow you to adjust the angle of the longer end of the mudguard up or down (as shown in the second image). Once the adjustment is complete, rotate the button in the direction of the arrow to tighten it (as shown in the third image).

VII.Completed Installation Diagram of Fat ebike Front Mudguard #